Entities#
An Entity represents an independent object that exists within a scene/game world. This can be player or enemy
characters, environment objects or non-visual elements like a game manager.
Entity Lifecycle#
For an entity to do anything useful, we need to hook into its lifecycle to write custom logic. This can be done by
extending the Entity class and overriding lifecycle methods as shown below:
MyObject.java
import dev.gamekit.core.Entity;

public class MyObject extends Entity {
  public MyObject() {
    super("Entity Name");
  }

  @Override
  protected void start() { }

  @Override
  protected void update() {  }

  @Override
  protected void render() {  }

  @Override
  protected void stop() {  }

  @Override
  protected void resume() {  }

  @Override
  protected void dispose() {  }
}
| Lifecycle | Description | State Before | State After |
|---|---|---|---|
start |
Called once to initialize itself | State.NEW |
State.ACTIVE |
update |
Called continuously to update itself | State.ACTIVE |
State.ACTIVE |
render |
Called continuously to render itself | State.ACTIVE |
State.ACTIVE |
stop |
Called when entity is stopped, before it moves to the inactive state | State.ACTIVE |
State.INACTIVE |
resume |
Called to resume an inactive entity, before it moves to the active state | State.INACTIVE |
State.ACTIVE |
dispose |
Called when scheduled for destruction using destroy() |
State.ACTIVE |
State.DOOMED |
Entity Members#
These are other publicly available entity members:
| Method | Description |
|---|---|
logger |
The Log4j logger object of the entity instance |
getParent |
Returns the entity's parent entity |
getState |
Returns the current state of the entity |
addChild |
Adds a child entity at the end of the current frame |
removeChild |
Removes a child entity at the end of the current frame |
findComponent |
+1 Returns the first component matching the given class+2 Returns the first component matching the given class and passing the provided filter |
findComponents |
Finds all component matching the given class and inserts them into the provided out list |
destroy |
Marks the entity as DOOMED and schedules it for destruction at the end of the current frame |
Scenes#
A Scene is a collection of entities that makes up a logical part of your game. This can be a main menu, settings page
or a level within your game.
Scenes are actually special entities that can create and manage their own user interface. As such, scenes have the same lifecycle as entities and inherit their public and protected members.
The sample below shows a custom scene class:
import dev.gamekit.core.Scene;

import java.awt.Color;

public class CustomScene extends Scene {
  public CustomScene() {
    // The scene name will be used in logs
    super("Hello Game");
  }
}
Camera#
A Scene contains a protected camera field which gives you the ability to pan and zoom around in your game world.
This is useful for features like player/object tracking.
The Camera class is incredibly simple to use. The table below shows all the available methods of Camera:
| Method | Description |
|---|---|
lookAt |
Positions the camera such that the given coordinates appear in the center of the window |
setZoom |
Sets the zoom level of the camera |
screenToWorldPosition |
Converts a point in screen coordinates to a point in world coordinates |
worldToScreenPosition |
Converts a point in world coordinates to a point in screen coordinates |
getX |
Returns the x translation of the camera |
getY |
Returns the y translation of the camera |
User Interface#
As mentioned previously, a scene can create and manage its own user interface. This is done by overriding the createUI
lifecycle method and returning the interface description.
The sample below shows the UI for a bottom-center aligned text with 48px padding and content "Hello World":
import dev.gamekit.core.Application;
import dev.gamekit.core.Scene;
import dev.gamekit.core.Renderer;
import dev.gamekit.ui.enums.Alignment;
import dev.gamekit.ui.widgets.Align;
import dev.gamekit.ui.widgets.Padding;
import dev.gamekit.ui.widgets.Text;
import dev.gamekit.ui.widgets.Widget;

import java.awt.Color;

public class UIShowcase extends Scene {
  public UIShowcase() {
    super("UI Showcase");
  }

  public static void main(String[] args) {
    Application game = new Application("UI Showcase") { };
    game.loadScene(new UIShowcase());
    game.run();
  }

  @Override
  protected void render() {
    Renderer.clear(Color.BLACK);
  }

  @Override
  protected Widget createUI() {
    return Align.create(
      props -> {
        props.horizontalAlignment = Alignment.CENTER;
        props.verticalAlignment = Alignment.END;
      },
      Padding.create(
        48, Text.create(
          props -> {
            props.text = "Hello World";
            props.fontSize = 32;
            props.alignment = Alignment.CENTER;
            props.fontStyle = Text.BOLD;
          }
        )
      )
    );
  }
}
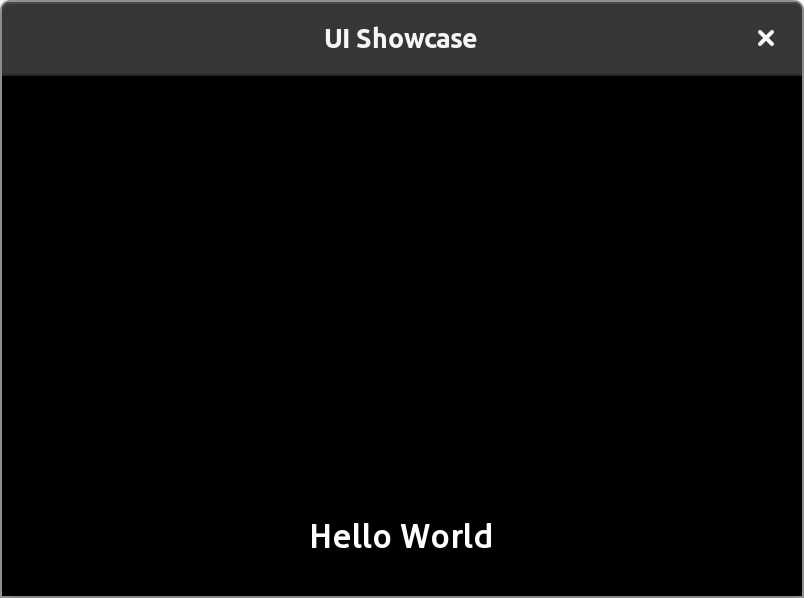
This is just a simple use case showcasing how easy it is to create declarative UI with GameKit. The topic of UI is explored in much more detail in a later section.
Loading Scenes#
To load a scene class into your game, use the loadScene method on the Application instance.
Application.getInstance().loadScene(new CustomScene());
This primes your scene to be started at the end of the current scene. If another scene is currently running, it will be disposed of at the end of the frame prior to the new scene being loaded.
Scene Stacking#
Scene stacking is a unique feature of GameKit where you can load a new scene without disposing the current scene.
When a new scene is stacked, the current scene is put in a suspended state which can be resumed later with optional data returned from the new scene.
This allows you to maintain clean separation of logic and entities between scenes.
The video below is taken from GTA: Vice City, where the player character is entering the hotel building. Notice how the scene transitions from the outdoor to the hotel interior scene following the fade to black. This is what scene stacking allows you to accomplish in your game.
The "outdoor" (current) scene is effectively paused while the "indoor" (new) scene runs. When the player is ready to leave the "inside" scene, you can resume the "outdoor" scene.
To stack a new scene class on top of the current scene, use the stackScene method on the Application instance.
Application.getInstance().stackScene(new CustomScene());
You can later use the popSceneStack method on the Application instance to end new scene and resume the previously
suspended scene. The popSceneStack has an overload which accepts data to be passed back to the suspended scene.
// End the current scene and resume the suspended scene
Application.getInstance().popSceneStack();

// or

// End the current scene and resume the suspended scene, passing back some data
Application.getInstance().popSceneStack(data);
In the suspended scene, you can override the void resume(Object data) method to access the data passed from the ended
stacked scene.
void resume(Object data) {
  // Do something with the returned data
}
Next Steps#
Now that you are familiar with entities and scenes, we recommend you check out our examples sections for related samples to strengthen your understanding on the topic.
Next, we explore components which are mechanisms for attaching behaviours to entities.