User Interface (UI)
In the context of games, a user interface is a group of visual components that is usually overlaid on the game world. This conveys information to the player, usually about the state of the current level and also allows for player input.
These components include text, buttons, sliders, inputs and toggles amongst others. The screenshot below showcases the UI from a game created with the engine, Industrio.
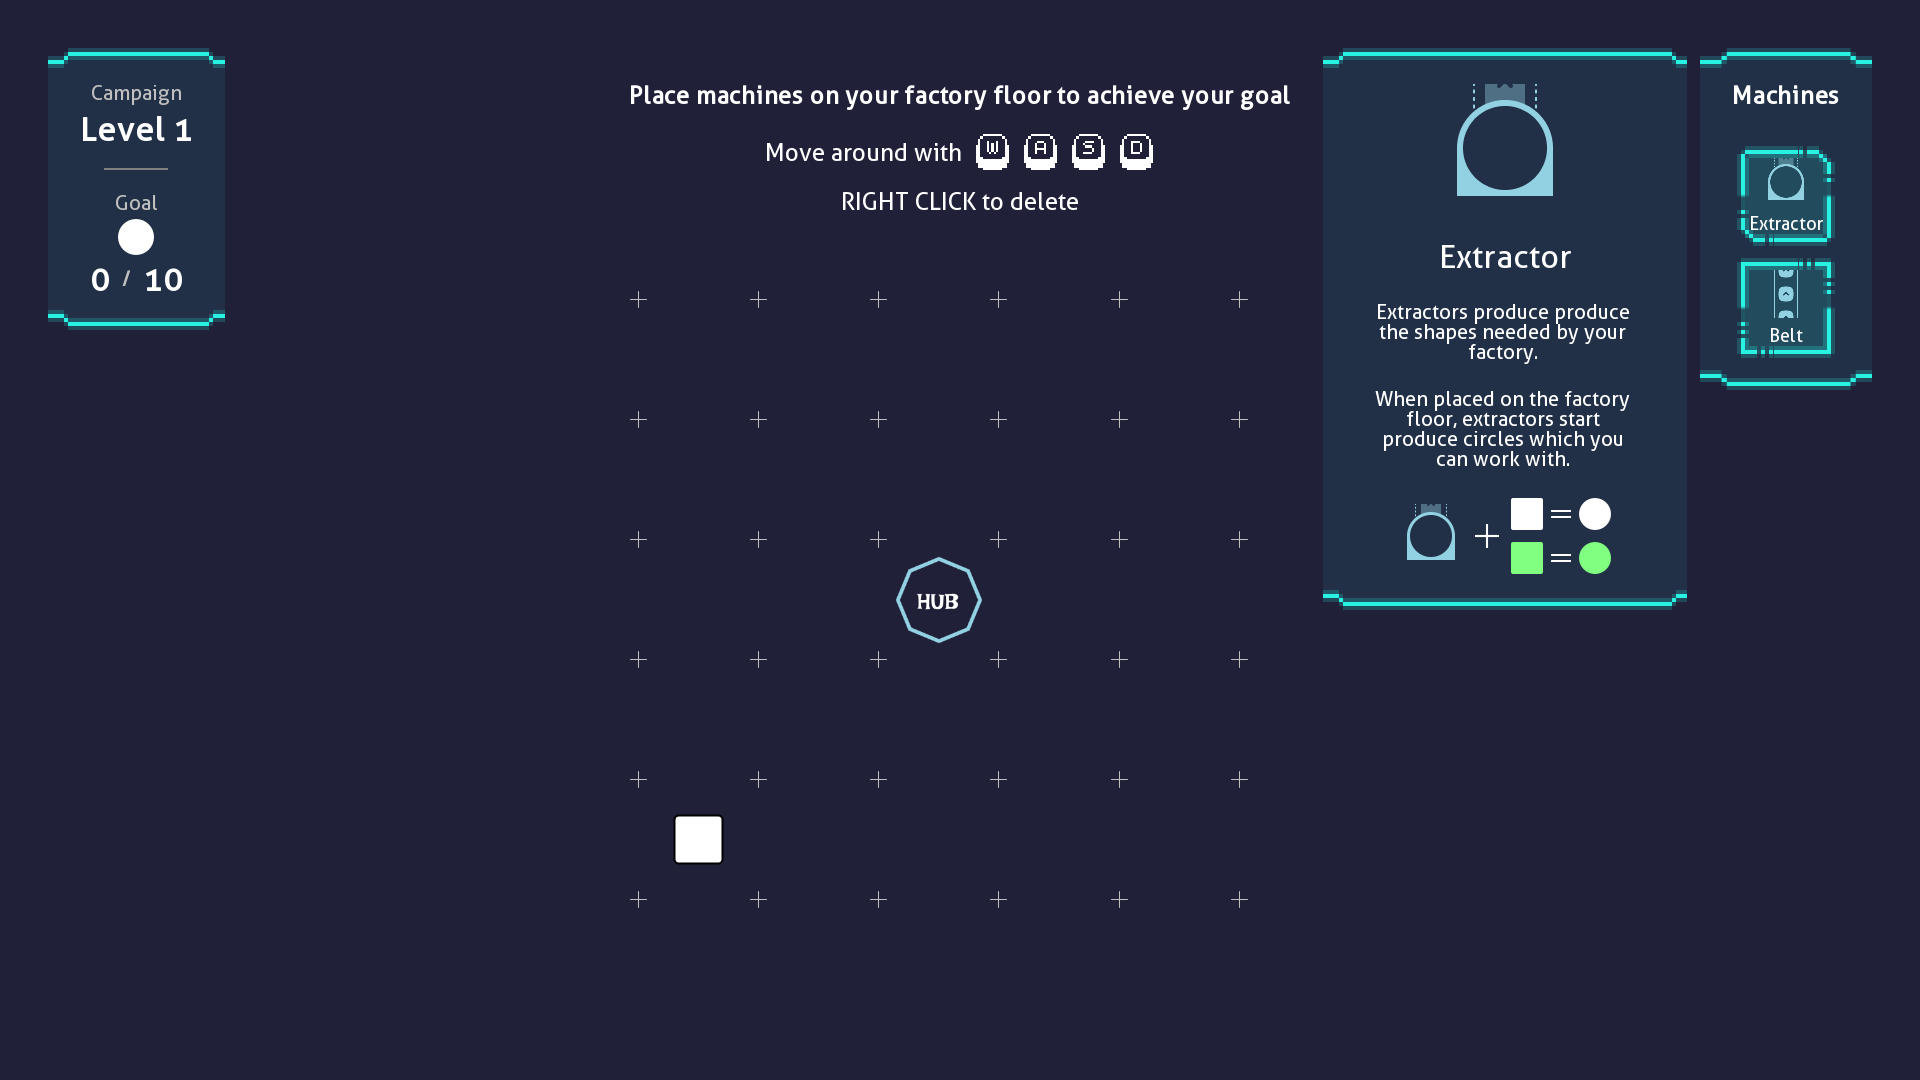 User Interface Example (Industrio)
Getting Started
In GameKit, the user interface (UI) is created and managed by the Scene class. To create a UI for your scene, you
override the createUI method as shown below:
import dev.gamekit.core.Application;
import dev.gamekit.core.Input;
import dev.gamekit.core.Scene;
import dev.gamekit.ui.enums.Alignment;
import dev.gamekit.ui.enums.CrossAxisAlignment;
import dev.gamekit.ui.widgets.*;

public class UserInterfaceSample extends Scene {
  private String titleText = "Hello GameKit";

  public UserInterfaceSample() {
    super("UI Scene");
  }

  public static void main(String[] args) {
    Application game = new Application("User Interface") { };
    game.loadScene(new UserInterfaceSample());
    game.run();
  }

  @Override
  protected Widget createUI() {
    return Center.create(
      Column.create(
        Column.config().crossAxisAlignment(CrossAxisAlignment.STRETCH),
        Text.create(
          Text.config().fontSize(72).alignment(Alignment.CENTER),
          titleText
        ),
        Text.create(
          Text.config().fontSize(24).alignment(Alignment.CENTER),
          "User Interface Sample"
        )
      )
    );
  }
}
Here, the root of the UI is a Center widget which, well, centers its child. Within the Center widget, we create a
Column widget which stretches its children horizontally and contains two Text widgets. The resulting UI looks like
this:
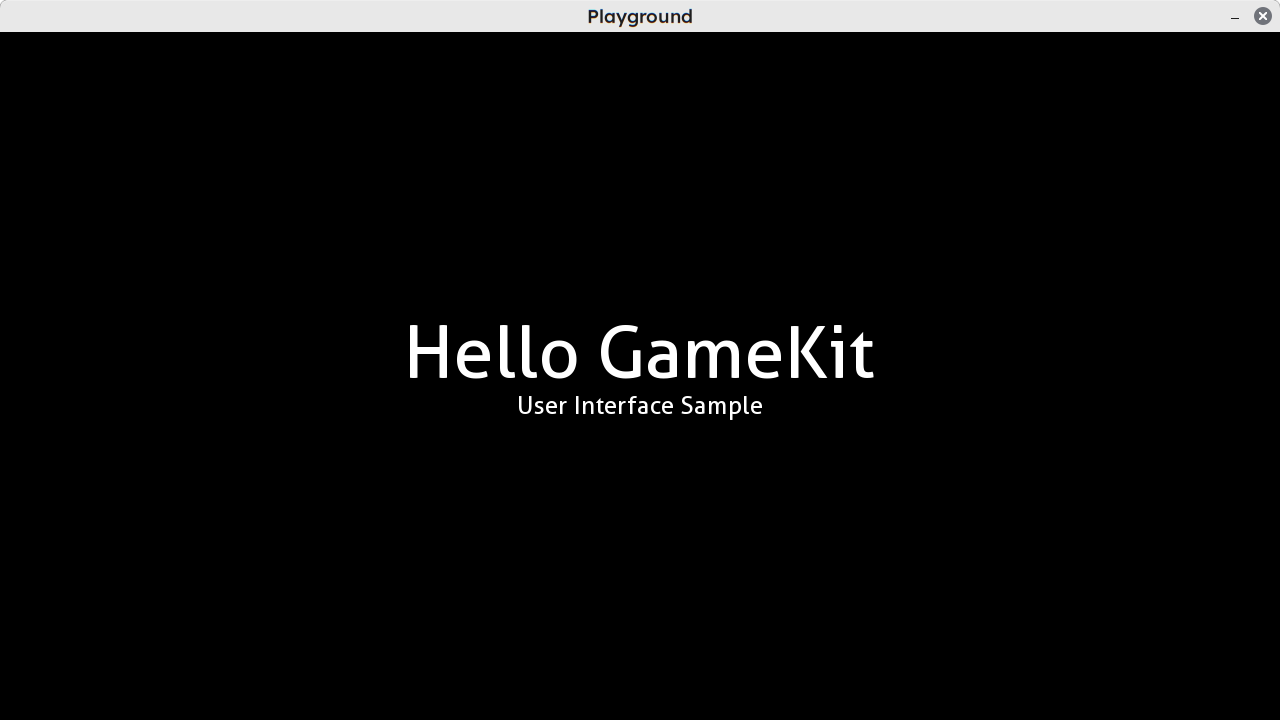 User Interface Sample
 User Interface Sample (Showing bounds)
Widgets
Widgets are the building blocks of UI in GameKit. Formally speaking, a widget is an abstract representation of a portion of a scene's user interface.
Widgets are used to describe all aspects of a user interface, including physical aspects such as text and buttons to layout effects like padding and alignment.
Widgets in GameKit take heavy inspiration from Flutter's Box Constraint model which I highly recommend checking out for a more grounded understanding of how to create widgets in GameKit.
Widget Catalog
GameKit ships with several widgets which you can use to create most kinds of layout. These are grouped into two types: parent widgets and leaf widgets.
Parent Widgets
As their name implies, these are widgets which nest one or more widgets within them. Parents are generally used for layout and don't have an appearance themselves.
The table below lists and describes all parent widget provided by GameKit.
| Widget | Type | Description |
|---|---|---|
Row |
MultiChildParent |
Lays out its children in a horizontal axis |
Column |
MultiChildParent |
Lays out its children in a vertical axis |
Stack |
MultiChildParent |
Lays out its children on top of each other |
Scaled |
SingleChildParent |
Scales its child by a given factor |
Padding |
SingleChildParent |
Adds internal spacing around its child |
Align |
SingleChildParent |
Aligns its child within itself |
Sized |
SingleChildParent |
Constrains its child to a fixed or proportional size |
Theme |
SingleChildParent |
Sets common theme values for its descendants |
Panel |
SingleChildParent |
Renders a background behind its child using the 9-patch algorithm |
Opacity |
SingleChildParent |
Renders its descendants with transparency |
Button |
SingleChildParent |
Triggers an action when clicked, while rendering its child as-is |
Checkbox |
SingleChildParent |
Renders a checkbox to the left of its child |
Compose |
SingleChildParent |
A base for creating custom widget trees |
Leaf Widgets
Leaf widgets are standalone widgets which render a distinct appearance.
The table below lists and describes all leaf widget provided by GameKit.
| Widget | Description |
|---|---|
Text |
Renders text with specific properties |
Field |
A Text widget extension which accepts input |
Image |
Renders an image |
Progress |
Renders a configurable progress bar |
Slider |
A Progress widget extension which updates a value by moving a slider knob |
Colored |
Renders a solid color background |
Empty |
A no-size component which renders nothing. It's is the widget equivalent of null |
Widget Instantiation
Widget instances are created by using the static create method on the widget's class. The widget can accept a
configuration object, a child widget/list or both, as shown below:
// Stack widget needs no configuration, so it just accepts the list of children
Stack.create(
  Text.create("Hello"),
  Text.create("World"),
);

// Columns can accept a list of children and/or a configuration object
Column.create(
  Text.create("Hello"),
  Text.create("World"),
)

Column.create(
  Column.config(),
  Text.create("Hello"),
  Text.create("World"),
)
The configuration object can also be created by calling the static config() method on the widget, then chaining
property method calls on it:
Padding.create(
  Padding.config().padding(24, 0, 0, 24), // Top, Right, Bottom, Left
  Column.create(
    Column.config().gapSize(24).crossAxisAlignment(CrossAxisAlignment.CENTER),
    Text.create("Hello"),
    Text.create("World"),
  )
)
UI Updates
UI is rarely static. There comes a point when you need to update variables whose values are used in them. In most game engines, you'd have to get a reference to a UI component instance and calling methods on it.
As an example, here's a screenshot from a previous game project created with the Godot engine. The task here was to update the text field of a UI label node.
You'd notice on line 12, that we grab a references to the $CanvasLayer/LandedLabel node, then on line 44, we update
the text string.
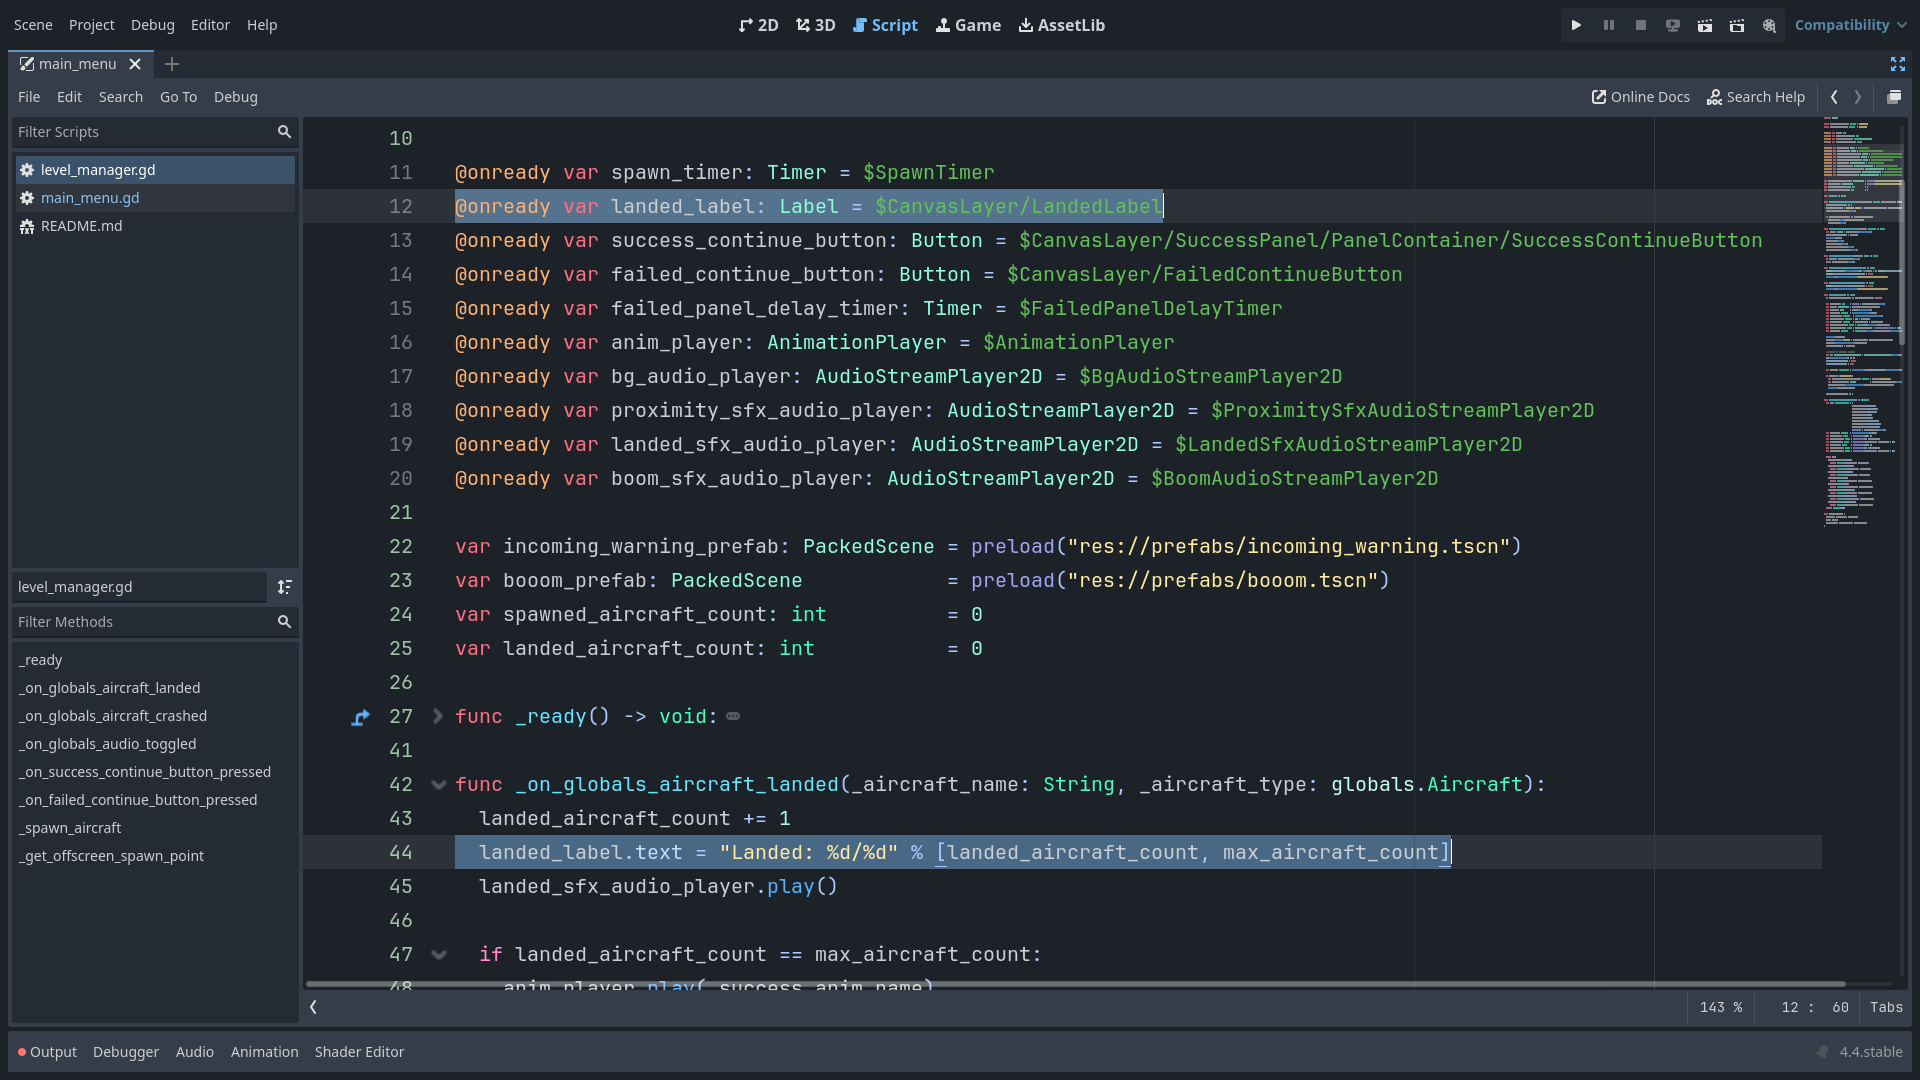 Godot Imperative UI Update
This approach to updating UI is known makes the UI system an imperative one. With imperative UI, you have to
explicitly specify how updates need be performed.
GameKit, like the Flutter framework referenced above, uses another approach in its UI system known as a declarative approach.
With the declarative approach, you specify what the final state of the UI should be, then have the engine compute the steps needed to take the UI from its current state to your desired state.
One core difference is that imperative UI focuses on the component/widget instances, while declarative UI focuses on the state of the UI.
GameKit UI Updates
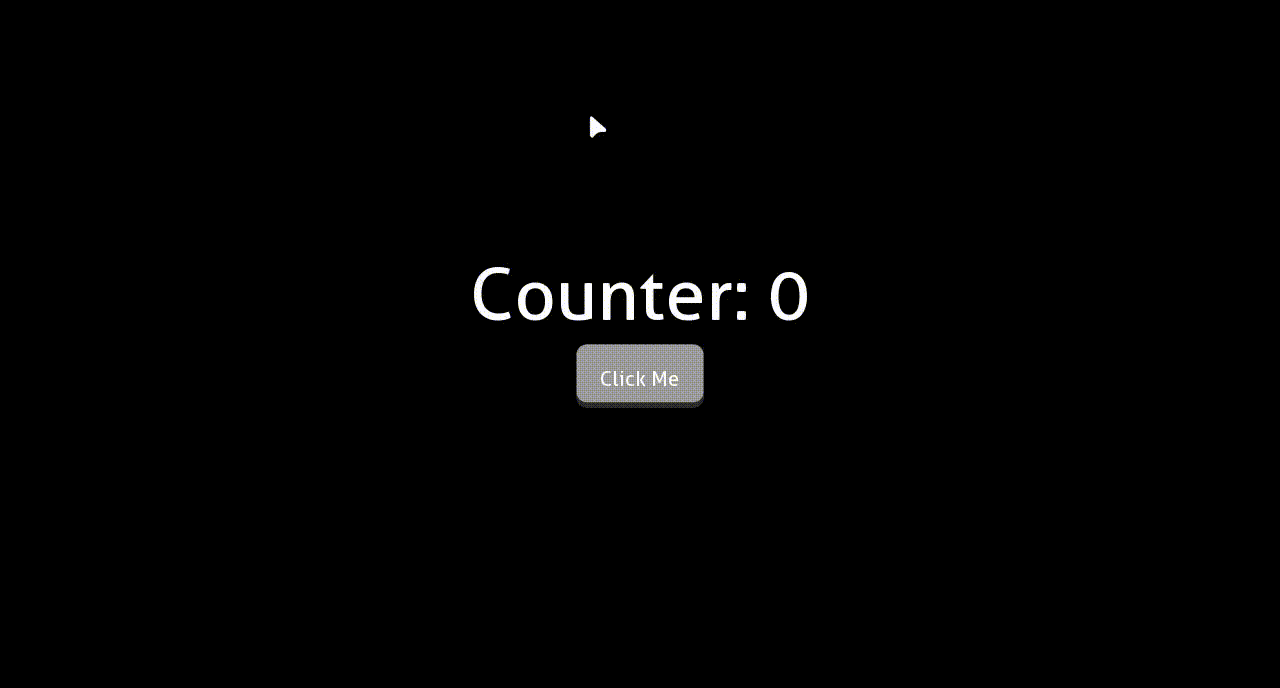
To put into practice, what we discussed above, let's have a simple layout of a button and text. When the button is pressed, we increase a counter variable which reflects in the text widget.
The state of the UI is the collection of variables and constants which the UI depends on and here, the state of the UI
comprises the counter variable.
import dev.gamekit.core.Application;
import dev.gamekit.core.Renderer;
import dev.gamekit.core.Scene;
import dev.gamekit.settings.Resolution;
import dev.gamekit.settings.Settings;
import dev.gamekit.settings.TextAntialiasing;
import dev.gamekit.settings.WindowMode;
import dev.gamekit.ui.enums.Alignment;
import dev.gamekit.ui.enums.CrossAxisAlignment;
import dev.gamekit.ui.events.MouseEvent;
import dev.gamekit.ui.widgets.*;
import dev.gamekit.ui.widgets.Button;

import java.awt.*;

public class UiUpdateExample extends Scene {
  private int counter = 0;

  public UiUpdateExample() {
    super("Playground");
  }

  public static void main(String[] args) {
    Application game = new Application(
      new Settings(
        "Playground",
        WindowMode.WINDOWED,
        Resolution.HD,
        TextAntialiasing.ON
      )
    ) { };
    game.loadScene(new UiUpdateExample());
    game.run();
  }

  @Override
  protected void render() {
    Renderer.clear(Color.BLACK);
  }

  @Override
  protected Widget createUI() {
    return Center.create(
      Column.create(
        Column.config().crossAxisAlignment(CrossAxisAlignment.CENTER).gapSize(24),
        Text.create(
          Text.config().fontSize(72).alignment(Alignment.CENTER),
          String.format("Counter: %d", counter)
        ),
        Sized.create(
          Sized.config().width(128).height(64),
          Button.create(
            Button.config().mouseListener(this::incrementCounter),
            Text.create("Click Me")
          )
        )
      )
    );
  }

  private void incrementCounter(MouseEvent event) {
    if (event.type == MouseEvent.Type.CLICK) {
      counter++;
      updateUI();
    }
  }
}
Our focus in the incrementCounter method in the code above. Here we increment the counter by 1, essentially changing
the state of our UI. Anytime you change any UI state, you need to call the updateUI() method of the scene class to
reflect the change.
This is all there is to it on updating UI in GameKit. No keeping track of UI instances, no method calls on UI instances.
Just change your state and call updateUI().
Running this example results in the application showcased below: